Image may be NSFW.
Clik here to view.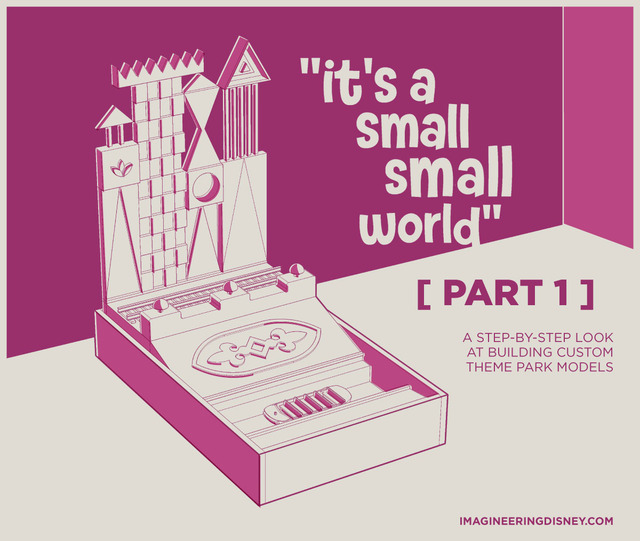
Who loves theme park models?? We do! Join me as I build a scale model of a portion of Disneyland's beautiful "it's a small world" exterior.
Image may be NSFW.
Clik here to view.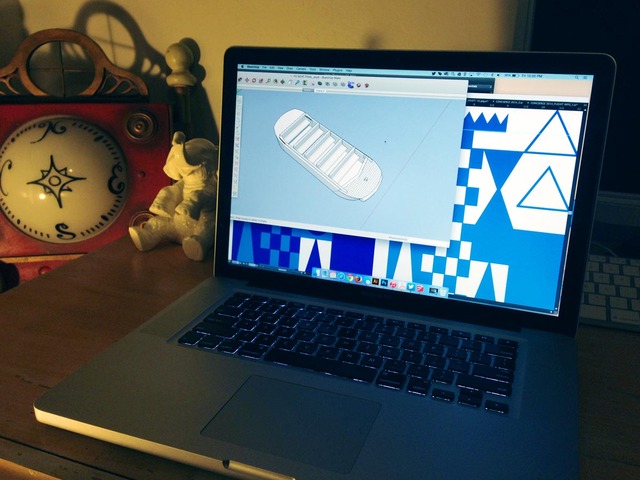
While I was building a tiny Jungle Cruise model, my wife suggested I model part of her favorite attraction, "it's a small world". I figured such a model would require many different fabrication processes... which would make for a good model-building tutorial... which is something I've wanted to do for a while... so here we are.
First, I decided to create a tiny passenger boat using a process I'd never tried before– 3D printing. I built a 3D model in Google Sketchup (free version!) then exported the file to Shapeways.com. Within seconds I had a price quote for each of the many materials offered by Shapeways (like plastic, steel, and even gold). I chose "White Strong & Flexible Plastic". This particular model at this size came in at just over $18.00.
Image may be NSFW.
Clik here to view.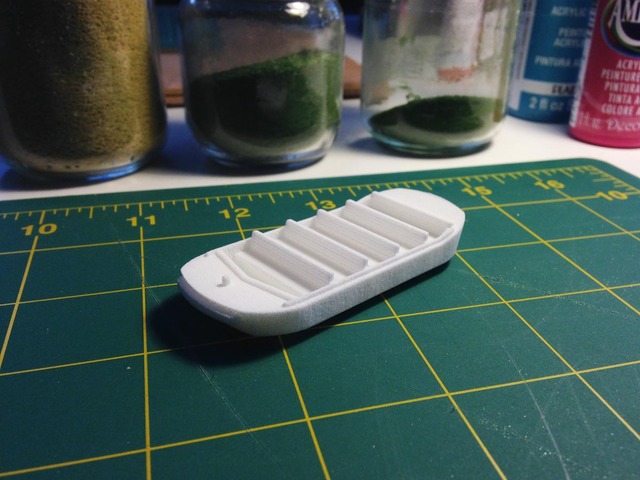
After a few business days (which felt like FOREVER), the tiny boat arrived in the mail. Basing my color selection on an old photo of an actual "it's a small world" boat, I painted the 3D-printed boat with two shades of pink plus some black for the bumper.
Image may be NSFW.
Clik here to view.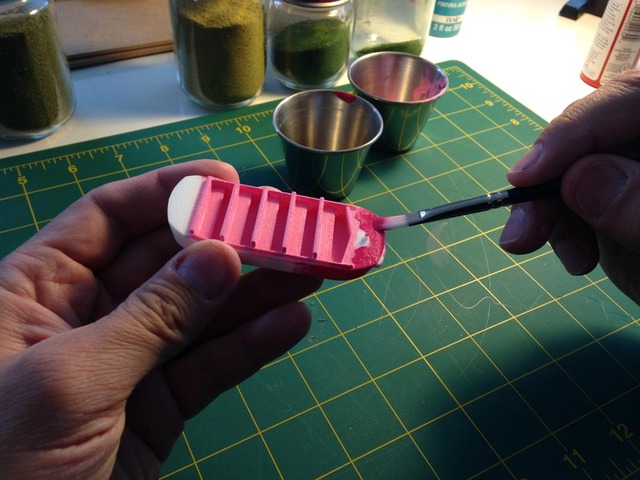
I found a pack of unpainted HO-scale figures by Model Power® at my local hobby store which I then painted with regular old craft paint.
Image may be NSFW.
Clik here to view.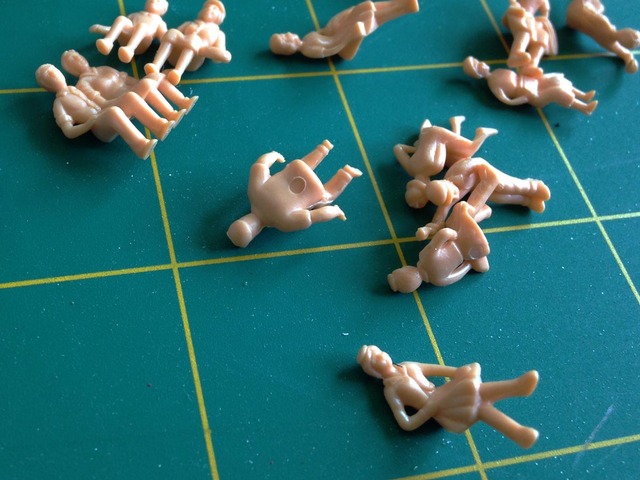
Image may be NSFW.
Clik here to view.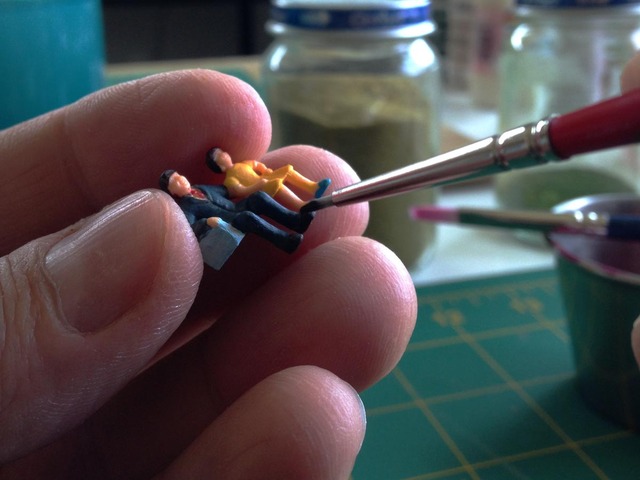
They fit!
Image may be NSFW.
Clik here to view.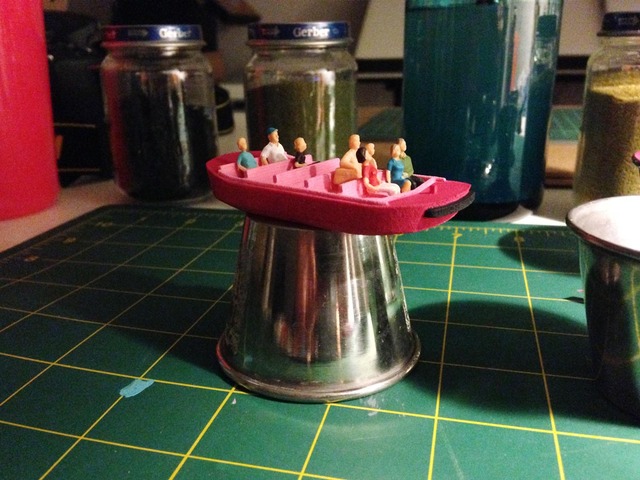
The layered cut-out look of Mary Blair's "it's a small world" facade called for some laser cutting. I drew each layer in Adobe Illustrator then separated the layers before sending them to be cut. I found a guy nearby with a laser cutter in his garage who offered to cut the designs into 1/16" clear acrylic for about $30.00.
Image may be NSFW.
Clik here to view.
Laser-cut pieces are cut with great precision and are well worth the cost. Cutting these by hand would have been a big old pain in the neck. No thank you.
Image may be NSFW.
Clik here to view.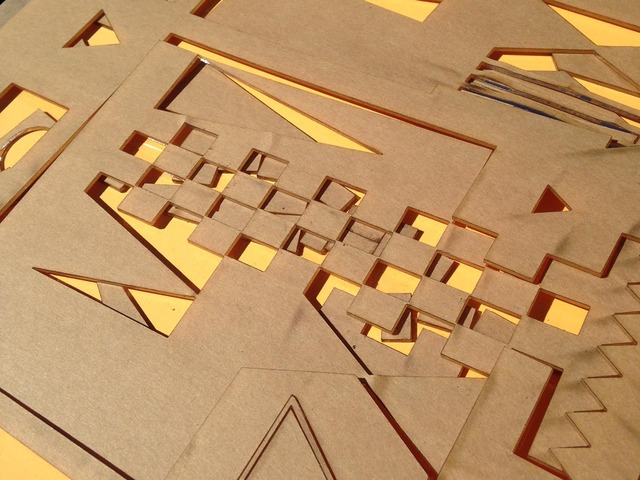
A quick check to see if everything is here.
Image may be NSFW.
Clik here to view.
Now it's time to peel away the protective paper... But only the portions that need texture.
Image may be NSFW.
Clik here to view.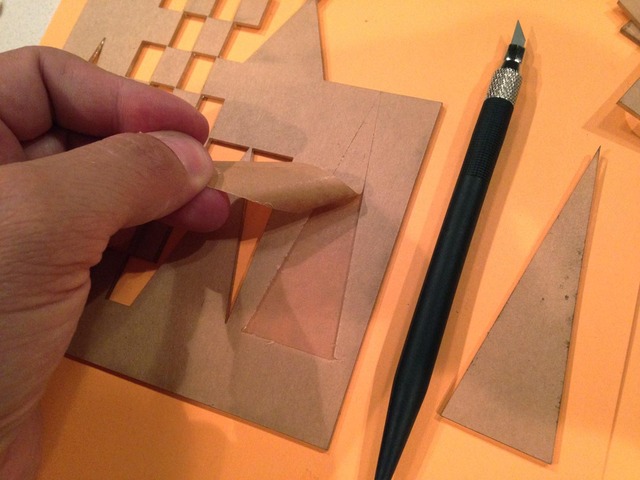
The protective paper serves perfectly as a mask, when cut accordingly.
Image may be NSFW.
Clik here to view.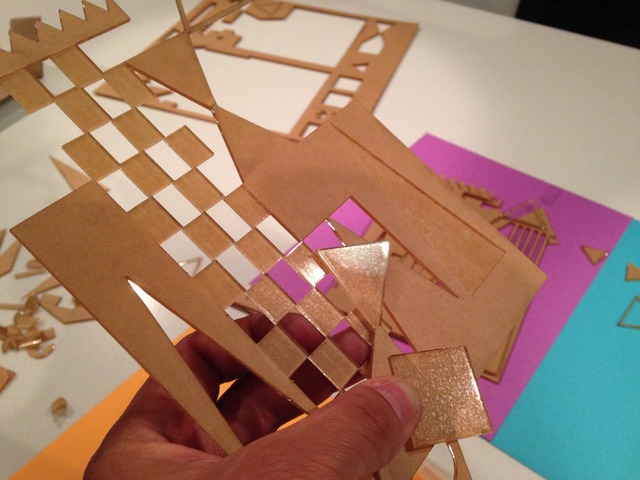
You'll notice the real "it's a small world" facade is made up of both smooth flats and textured flats. About half of this piece of facade needed texture. A quick coat of textured spray paint did the trick.
Image may be NSFW.
Clik here to view.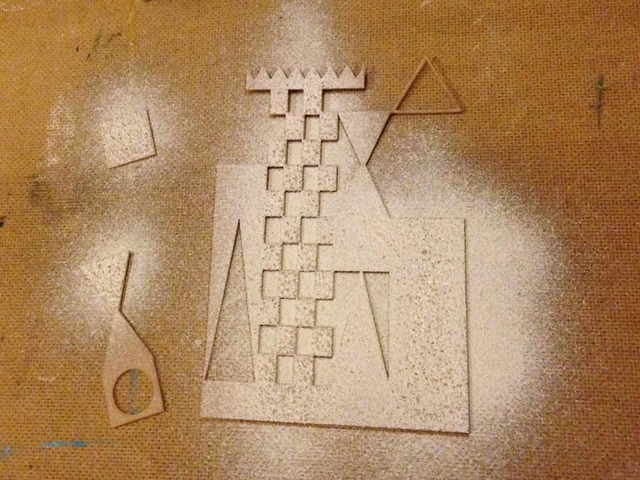
Next, all protective paper needed to be removed.
Image may be NSFW.
Clik here to view.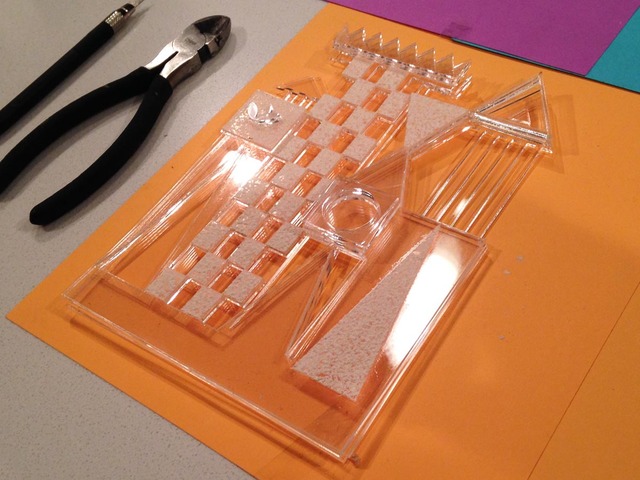
I then made a simple oak box to contain the model.
Image may be NSFW.
Clik here to view.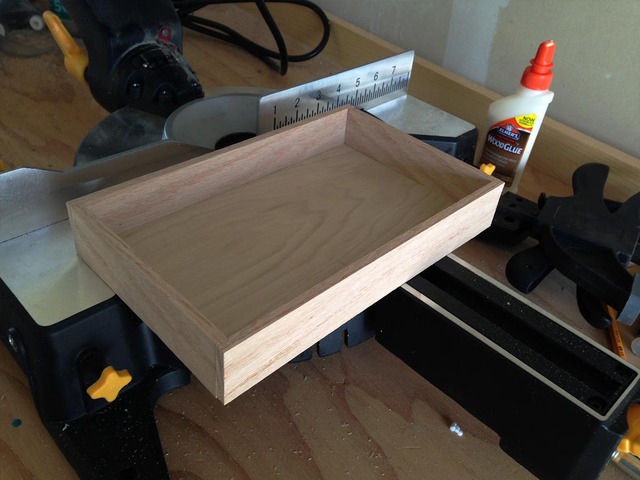
The flume was a cinch to construct. I used Evergreen Scale Models® sheet styrene and styrene strips (modeling must-haves) and Plastruct® Plastic Weld solvent cement (my favorite solvent) to join the styrene pieces together.
According the Evergreen package, "Unlike wood or other materials, styrene parts are joined by bonding with a solvent. Parts are assembled by merely holding them in position and applying a small amount of solvent to the joint. Use a small brush and apply the cement very sparingly– only a little is required to make a joint. The cement will be drawn into the joint by capillary action, softening the mating surfaces so that a fast bond, as strong as the styrene, is formed."
Image may be NSFW.
Clik here to view.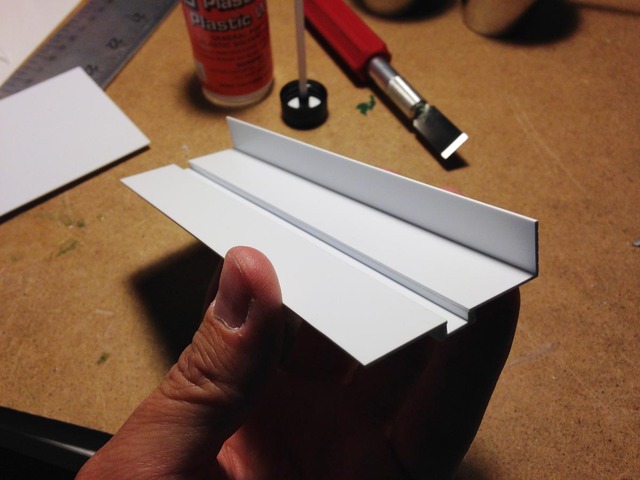
It's recommended that this sort of styrene structure be air brushed or spray painted, but I brushed on craft paint with a normal 1/2" flat brush and it turned out just fine.
Image may be NSFW.
Clik here to view.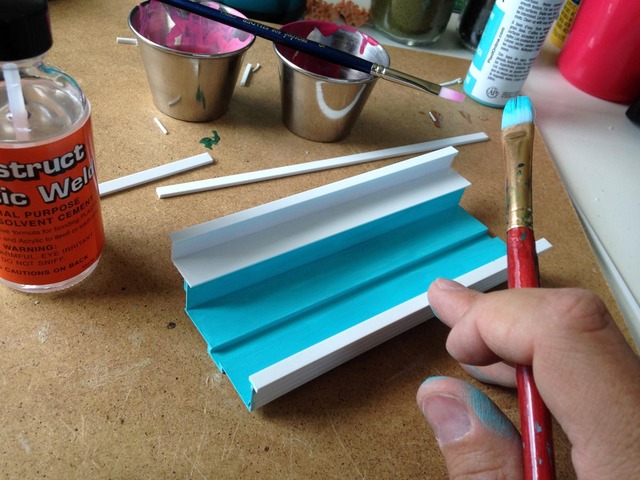
The same process of joining styrene together was applied to the clear acrylic pieces.
A block of green high-density floral foam is cut to form the hill between the flume and facade. More about this in Part 2.
A quick, temporary assembly of existing pieces brings the model to life.
Image may be NSFW.
Clik here to view.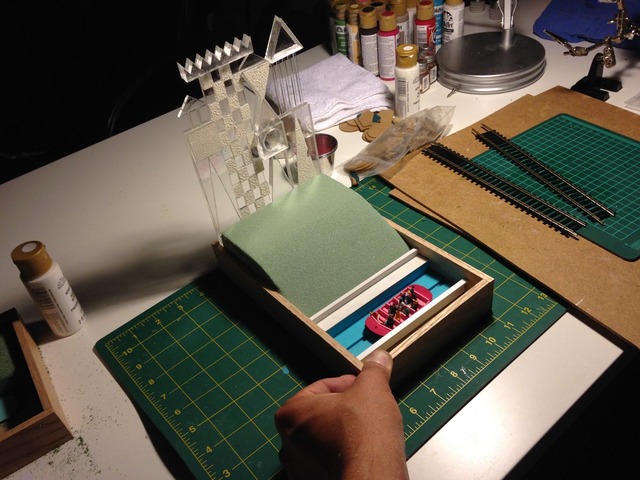
I then sprayed a coat of primer onto the acrylic.
Image may be NSFW.
Clik here to view.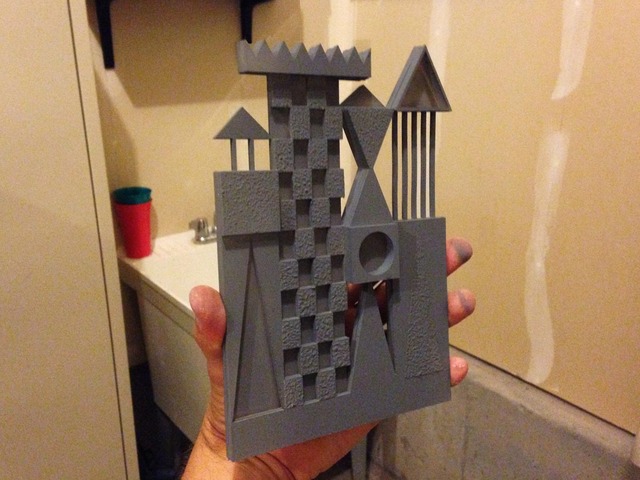
Then two coats of white spray paint.
Image may be NSFW.
Clik here to view.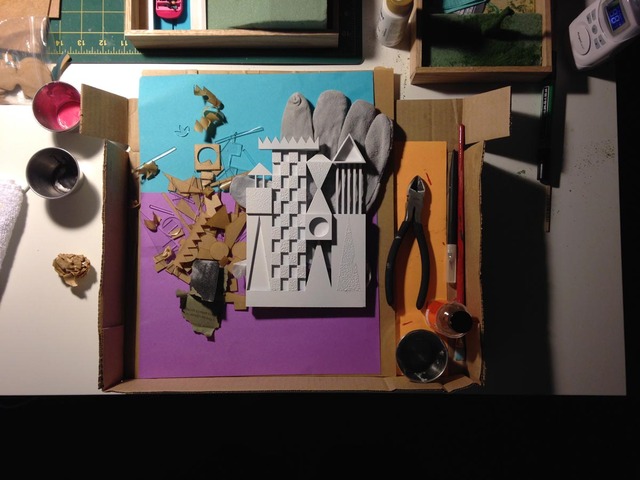
We're about halfway through the model-making process. You might be happy to know that this sort of thing requires less artistic ability than most people assume. It requires some know-how and a bit of practice, but really, most people can do what you see here.
Stay tuned for Part 2.
Related posts:
Tiny Jungle Cruise Model
Tiny Submarine Voyage + PeopleMover Model
EPCOT City Model [Part 1]
Working Splash Mountain Model
Mechanizing a Miniature Main Street Electrical Parade
Mars and Beyond Robot
Swiss Family Treehouse Model